
To make the hinge part, I made a press plate and using a vise;

I pressed a pin into the groove,

then heated the unformed part of the strap and closed them over the pin. Same for the other side and presto, hinges.
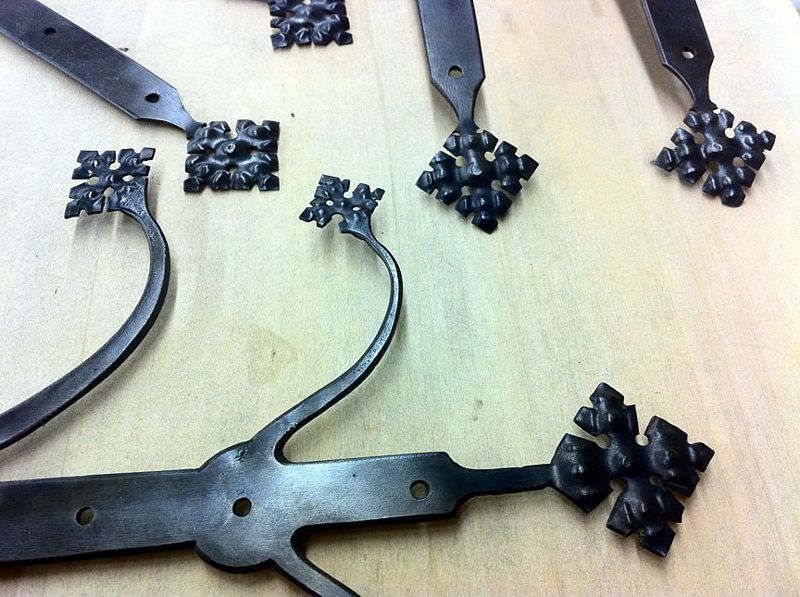
The decorations at the ends where made by first thinning the metal to about 16ga. And then using punches, I punched the "bumps" in from the back on a piece of lead. To finish the design, I made cuts with dykes, then using a torch to heat the steel to yellow hot a few times with a quench and wire bush in between, I was able to burn out the thinner cut edges left by the dykes and open up the cuts to match the look of the original. I then tuned them up a little with a file and blackened them and applied a paste wax.
After making those I made the lock plates, although I stopped short of actually making locks for them.
For the final assembly of the cabinet, I needed dowel pins. Using a technique I learned from a traditional rake maker, I sharpened a steel tube that had the correct inside diameter and rough cut pine chunks and drove them through the sharpened tube. The result is nicely cut round pegs. These where driven into drilled hole bisecting the tennons and side panels. All glued with white glue.
The cupboard was made from Pine, but I wanted a darker look and so I used Mahogany leather dye and with an atomizer, sprayed the dye onto the finished cabinet. I then applied a urethane clear with a spray gun.
In order to save some time, I ordered some nails from www.tremontnail.com (thanks for the tip) and tuned them up a little and finished the cupboard. Here is the result with the Keg “jockey box” on top.


